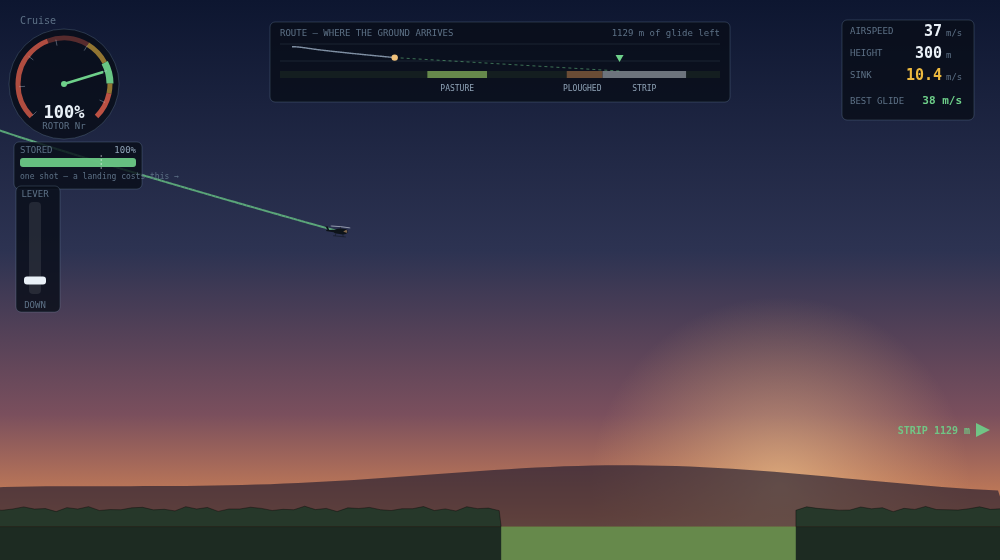
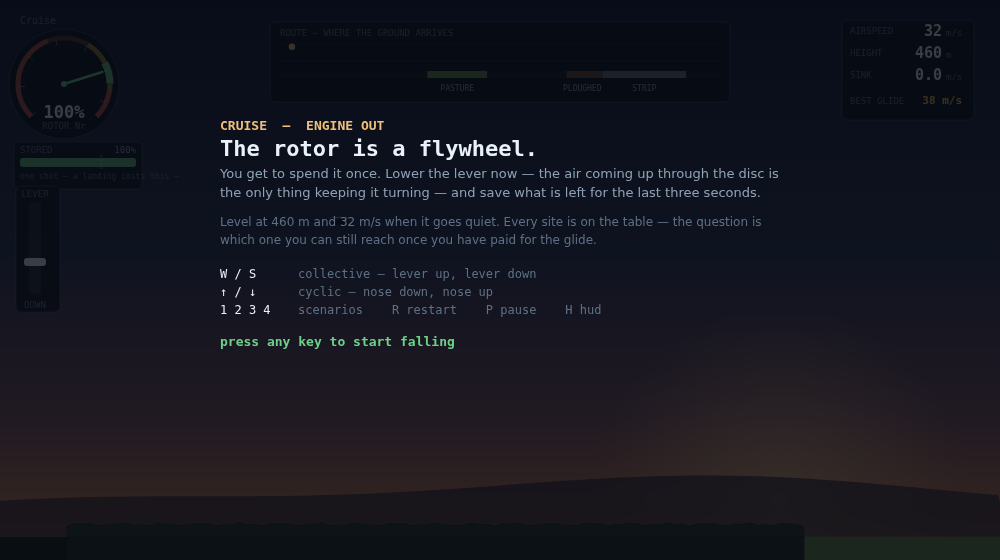
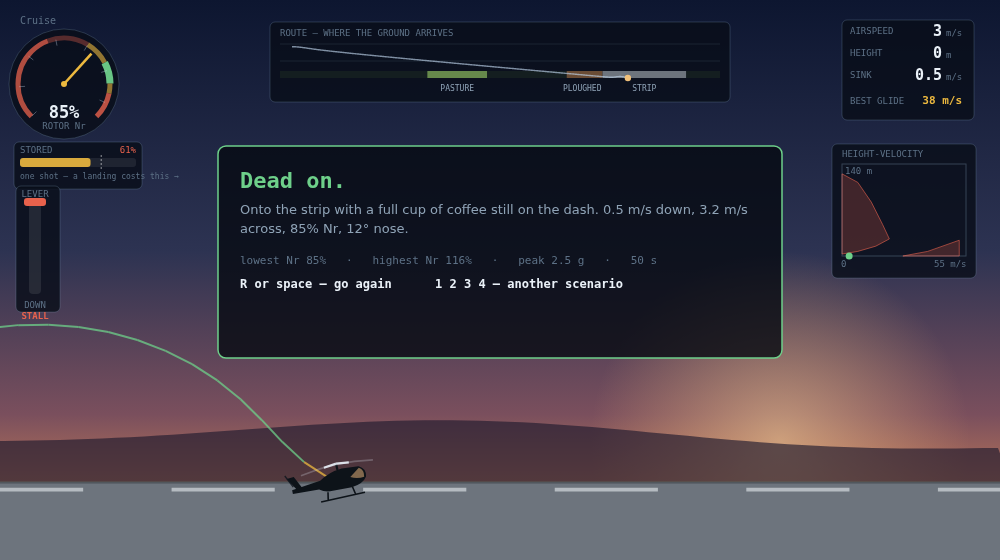
A helicopter that loses its engine is not a brick, and the reason is worth playing rather than reading. The rotor above you has real mass turning at two hundred metres a second at the tip, and once you take the pitch out of the blades the air coming up through the disc keeps driving them round for free. You are a glider now, at about four to one, with a flywheel holding roughly a megajoule.
That megajoule is the whole game. It is the only thing that can turn 1,900 feet a minute of descent into a landing, it takes about two seconds to spend, and there is no way to put any back. The instinct that kills you is the obvious one: the ground is coming, so you pull the lever. It works. You get three comfortable seconds and a noticeably slower descent, and you have just spent the landing a hundred metres up.
Flying it
W / S is the collective — the lever that puts pitch into the blades. ↑ / ↓ is the cyclic, nose down and nose up, the way the stick works in the aircraft. That is the entire input surface.
- Lower the lever, now. The clock in this game starts before you are ready. Blade pitch is drag, drag is the thing eating the rotor, and the airflow cannot drive the disc through blades that are busy making lift. Nr decays from 100% to 70% in about three and a half seconds if you leave it where it was.
- Trim Nr with the lever, speed with the stick. Lever fully down is not the answer either — in a real descent the rotor happily overspeeds itself past its limits, so the lever lives a couple of degrees up and you nudge it. The green arc is where the blades are neither stalling nor coming apart.
- Pick a site with the reach marker, not with your eyes. It is drawn on the ground, and on the route strip when it is past the edge of the window.
- Flare at about 25 m. Nose up hard. Forward speed becomes upward flow through the disc, which arrests the descent and winds the rotor back up — you get the 16 points of Nr back that the previous forty seconds cost you.
- Level it, then pull everything. The flare has to be flown out before the skids arrive or the tail rotor gets there first, and the last of the lever comes in at about 11 m. That is the two seconds the whole flight was for.
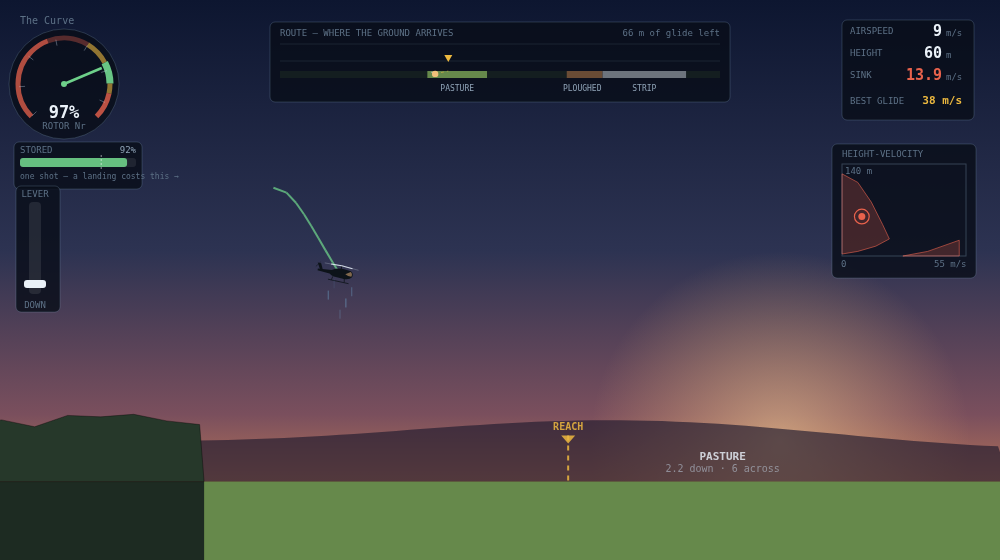
Four situations. Cruise is the teaching one. Headwind is the one that catches people, because 9 m/s on the nose does not just move the far site out of range — it makes the near one hard to stop short for, and the answer is to fly slower than feels right. The Curve puts you inside the shaded region of the height-velocity diagram at 85 m and 6 m/s, where walking away bent is a pass. High Hover is 14 m and stationary, which is under the curve rather than inside it: no glide, no flare, just the last thing you do.
The two instruments
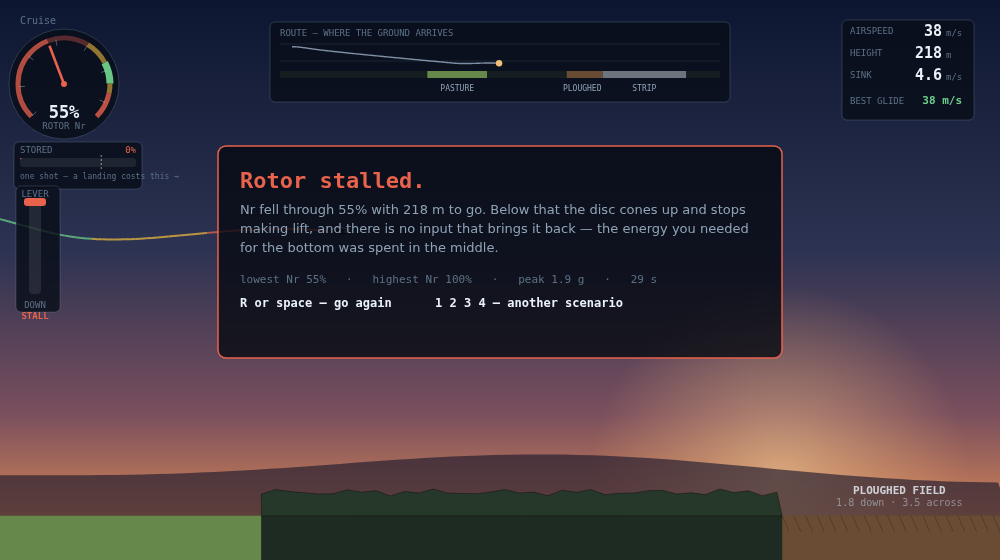
The tach, and the bar under it. The needle is rotor RPM. The bar is stored energy, and they are not the same number, because energy goes as Ω². At 90% Nr the needle looks nearly fine and the bar is at 81%; at 70% the needle is merely low and the bar is at 27%, which is not enough to land with. The dashed line on the bar is what a flare and cushion actually costs — about 70% of a full one. Watching the needle makes you relaxed and watching the bar makes you honest.
The height-velocity diagram, which fades in as you come down through the altitudes where it is the only chart that matters. The shaded regions are the combinations of height and airspeed from which an engine failure has no good answer: too low to trade height for speed, or too slow to flare. The dot is you. Most of the time it sits in the white and you never think about it, which is exactly how real pilots experience it — right up until the run where it does not, and then it is the only thing on the screen.
There is also a route strip along the top, because from 400 m the site you want is off the side of the window, and a glide decision you cannot see is not a decision.
What’s under it
src/flare.mjs is the whole aircraft, headless, no canvas anywhere in it. The
rotor is textbook blade-element momentum theory and autorotation is not
special-cased — it falls out:
C_T = (σa/2)(θ/3 − λ/2)                     blade element, uniform inflow
λ_i = C_T / (2√(μ² + λ²))                   momentum theory, solved by iteration
C_P = λ_c·C_T + κ·λ_i·C_T + (σC_d0/8)(1 + 4.6μ²)
I·Ω̇ = −P/Ω                                 no engine: the rotor pays for everything
λ is inflow through the disc, positive downward — the hover case. Descend
and the air comes up instead, λ_c goes negative, and when it is negative
enough to outweigh the profile-drag term the required power C_P goes
negative. Negative required power means the rotor is being driven, and Ω̇ comes
out positive with no line of code anywhere saying the word autorotation.
The flare works for the same reason and by the same term. λ_c is computed
from the free-stream component along the thrust axis, u·sin(pitch) + w·cos(pitch), so pitching 25° nose up at 30 m/s puts 13 m/s of extra air up
through the disc on the spot. That single term is the whole trick of the
manoeuvre, and it is one line.
The coefficients are a light piston single’s — σ 0.05, C_d0 0.011, 5 m blades at
40 rad/s, 1,400 kg — and they are not tuned for feel. scripts/measure.mjs
checks them against the real machine, and the agreement is the reason to trust
the rest:
| model | R44 | |
|---|---|---|
| hover power | 187 kW | ~180 kW |
| hover collective | 8.1° | 8–10° |
| min descent in auto | 1,640 fpm at 26 m/s | ~1,350 fpm at ~28 m/s |
| best glide | 3.77:1 at 38 m/s | ~4:1 near 33 m/s |
The glide polar is solved, not simulated — three unknowns (collective, attitude, descent rate) against three statements of “nothing is changing”: no net vertical force, no net horizontal force, zero rotor power. A controller flying a rate-limited lever limit-cycles forever and never lands on the equilibrium, and the equilibrium is a property of the aircraft rather than of whoever is holding the stick. Injecting a solved trim into the integrator and leaving it alone for ten seconds holds it to three significant figures, which is the test that says the solver and the simulator are the same aircraft.
That polar then pays for itself twice. It places the landing sites — 460 m at 3.77:1 is 1,734 m of still air, so the strip starts at 1,560 and the pasture at 680, and the map is a consequence of the physics rather than a guess. And it drives the reach marker, which marches the polar forward in half-second steps from wherever you actually are, wind included.
Why the sites are different
Tarmac takes a run-on landing — 16 m/s across is fine, because the skids can slide. A ploughed field takes 3.5, because furrows grab. So the far site is the easier landing and the near one is the easier arrival, and there is no dominant choice: the pasture is a gift you pay for at the bottom, the strip is a run-on you have to fly a clean glide to be offered at all. Woodland is not a site, it is an 18 m obstacle, which is why gliding over a field you cannot quite reach is worse than landing short of it.
Reuse
src/flare.mjs— the aircraft.createRun(key)thenstep(run, dt, {coll, cyclic})with both in-1|0|1. ReadrotorState()for thrust/power/inflow at any state,trimmedGlide(u)for a solved equilibrium,polar()/trimAt(u)for the memoised curve,reach(run)for the marker. No imports, no DOM.scripts/measure.mjs— the calibration harness. Run it after touching any coefficient; it is the only thing standing between this and a flying toy.demo/carries its own copy (ADR-0002). Editsrc/, thencp src/flare.mjs demo/.
Gotchas
- Momentum theory is invalid in the vortex ring state, which is exactly the descending-slowly-with-power regime. The inflow iteration is damped and λ_i is clamped to 0.16 so it cannot diverge there. The game never asks you to hover under power, so the lie never gets tested, but it is a lie.
- The disc is rigid to the fuselage. There is no flapping, no pitch moment, no disc tilt independent of attitude, and the cyclic commands attitude rate directly. A real cyclic buys you disc tilt first and fuselage attitude second. This is the single biggest simplification in here and it is the one that makes the thing playable with four keys.
C_T/σis capped at 0.135 for blade stall, but the drag keeps climbing past it — which is why hauling the lever is expensive rather than merely useless. Without that term the optimal play is to yank it and hold.- Nr is hard-limited both ways: below 55% the disc cones up and nothing brings it back, above 120% the blades let go. Both ends are reachable in normal play and both are supposed to be.
- Gravity is real here (9.81), unlike Sway. The timescales worked out human-sized on their own: 55 seconds from 460 m, and a flare window a couple of seconds wide.
window.__demoexposes the live run plus afly()that flies the reference technique, which is how the screenshots are taken and the easiest way to drive the thing from a console.